With an estimated 3.75 million births annually in the U.S. and countless parents seeking convenient solutions, the demand for efficient baby care accessories is ever-present. Many parents find bulky diaper bags cumbersome for quick outings. A compact, custom-sewn diaper clutch offers a superior alternative, providing just enough space for essentials without the bulk.
This tutorial, detailed in the accompanying video, guides you through creating a stylish and functional diaper clutch or diaper pouch. It’s a beginner-friendly project, designed to build your confidence in sewing while crafting a practical accessory. This handmade diaper holder keeps wipes, a few diapers, or even a small change of clothes neatly organized for those “on-the-go” moments.
Elevate Your Diaper Clutch with Expert Material Selection
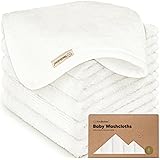
The foundation of any successful sewing project lies in material selection. For this durable diaper clutch, we opt for quilting cotton. This fabric is renowned for its durability, ease of care, and an impressive array of patterns. It handles frequent washing well, which is crucial for any baby item.
Essential Fabrics and Stabilizers for Your Diaper Pouch
Beyond your main outer and lining prints, you will need a few specialized items. Fusible interfacing, specifically Pellon 911F featherweight, adds crucial body and stiffness to your finished diaper clutch. This prevents your project from becoming floppy and ensures it maintains its shape, even when loaded with baby essentials. Batting provides a soft, padded structure, protecting the contents and giving your pouch a luxurious feel. For the exterior, you can use a cohesive design for a professional look, selecting complementary patterns for your lining and zipper trim. Remember, well-chosen materials directly impact the quality and longevity of your handmade diaper holder.
Hardware and Notions for a Functional Diaper Holder
The functionality of your diaper clutch also relies on specific notions. You need 3/4-inch wide Velcro for a secure closure, and an optional buckle if you prefer a detachable stroller strap. Gather your standard sewing tools: sharp fabric scissors, straight pins, and binder clips for managing multiple fabric layers. A temporary adhesive spray proves invaluable for securing batting before quilting, preventing shifts and puckering. If available, a rotary cutter with a self-healing mat offers precision for initial cuts, while pinking shears provide a neat, non-fraying edge for the wipe opening.
Master Diaper Clutch Construction: Foundation & Core Techniques
Effective construction relies on understanding fundamental sewing techniques. This project introduces several key processes, ensuring both a beautiful and robust outcome for your DIY diaper clutch.
Preparing Your Fabric with Fusible Interfacing
Fusing interfacing is a critical first step for adding structure. Pellon 911F featherweight interfacing features a bumpy, adhesive side and a smooth side. You position the bumpy side against the wrong side of your main fabric piece, aligning carefully. Apply heat with an iron to the fabric side, allowing the adhesive to bond completely. This process creates a stable foundation, giving the diaper pouch its professional crispness.
Precision Stitching for Durability: The Outer Shell
When assembling the main outer pieces, place them “right sides together.” This ensures your seam allowance encloses raw edges, creating a clean finish once turned. You will stitch a consistent 1/4-inch seam allowance along the designated edges. A 1/4-inch seam allowance, defined as the precise distance from your fabric edge to your stitch line, is standard in many quilting and accessory projects. Using a walking foot on your sewing machine is highly recommended. A walking foot feeds multiple layers of fabric evenly, preventing shifting and ensuring smooth, consistent stitches, particularly beneficial when working with thicker layers or preparing for quilting.
Crafting Your Custom Diaper Pouch Straps
The diaper clutch design includes two versatile strap options. You begin by creating a single, longer strap, then cut it in half to yield two individual straps. The project offers flexibility in strap width; while a 2-inch width is suggested, you can easily adjust this to a 1-inch width to suit your preference. Secure 3/4-inch wide Velcro onto each strap, carefully distinguishing between the softer loop side and the rougher hook side. Stitch all the way around the Velcro rectangle to ensure a durable attachment. For added utility, consider incorporating a buckle, creating a detachable handle perfect for attaching your diaper holder to a stroller.
Ingenious Design: The Diaper Wipe Opening
A standout feature of this diaper clutch is its custom-designed wipe opening, providing easy access to wipes without removing the pack from the pouch. This step ensures both convenience and a polished finish.
You begin by stitching a precise circular or shaped outline onto your fabric, as detailed in the pattern. After stitching, carefully cut a slit within this shape, leaving approximately a 1/4-inch margin from your stitch line. This “painfully close” cut, as the video notes, is critical for a smooth turn. If you have pinking shears, use them for this cut to help prevent fabric fraying around the opening. Once cut, push your lining fabric through this opening. Manipulate the fabric until the opening is perfectly turned and flat. Press the edges with an iron to set the seam, creating a neat, crisp aperture. The pattern includes various templates, allowing you to customize the opening size to perfectly fit your preferred brand of wipes, moving beyond generic designs.
Beyond Assembly: Preparing Your Diaper Clutch for Quilting
With the main components assembled and the wipe opening complete, your diaper clutch is now ready for the next exciting phase: quilting. Quilting adds texture, enhances durability, and further stabilizes the structure of your handmade diaper holder.
To prepare for quilting, apply a temporary adhesive spray to the batting layer. This spray effectively secures the batting to your fabric pieces, preventing any shifting or bunching during the quilting process. A well-secured batting ensures even stitching and a professional quilted finish. The subsequent quilting steps, crucial for adding visual appeal and structural integrity, will be detailed in Part 2 of this comprehensive series, allowing you to further personalize your DIY diaper clutch.
Stitch by Stitch: Your Diaper Accessory Q&A
What will I learn to make in this tutorial?
This tutorial teaches you how to sew a stylish and functional diaper clutch or pouch. It’s a beginner-friendly project designed to help you build confidence in sewing.
Why should I make a diaper clutch instead of using a large diaper bag?
A diaper clutch is a compact alternative to bulky diaper bags, perfect for quick outings. It provides enough space for essentials like wipes and a few diapers without being cumbersome.
What type of fabric is recommended for this sewing project?
Quilting cotton is recommended because it is durable, easy to care for, and comes in many patterns. This fabric handles frequent washing well, which is important for baby items.
What is fusible interfacing and why is it used for the diaper clutch?
Fusible interfacing is a material that adds body and stiffness to your fabric. It prevents your diaper clutch from becoming floppy and helps it maintain its shape, making it more durable.
What is a unique feature of this diaper clutch design?
A special feature of this diaper clutch is a custom-designed opening for wipes. This allows you to easily access wipes without having to take the entire pack out of the pouch.